



Description
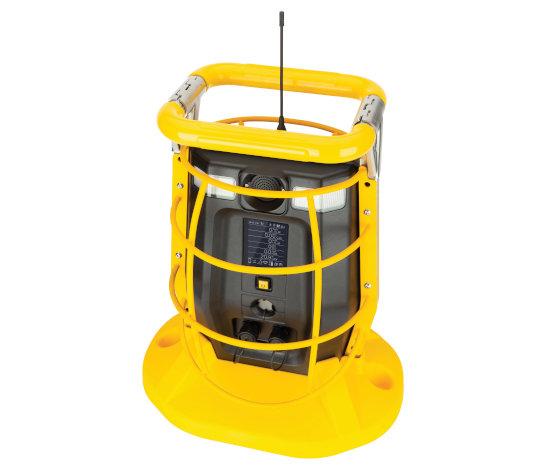
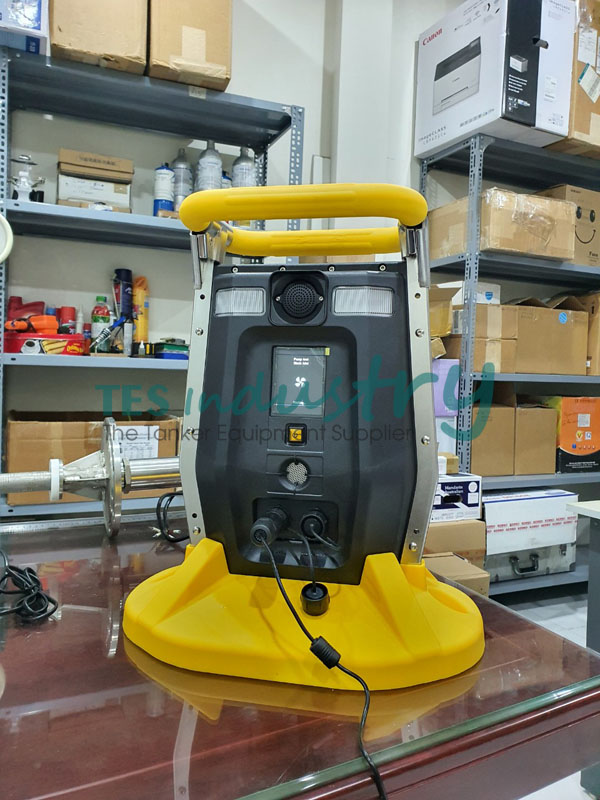
Honeywell BW™ RigRat, Transportable Multi-gas Area Monitor: LEL, CO2, VOC, CO, H2S, SO2, O2, NO, NO2, HCN, NH3, Cl2.
Honeywell BW™ RigRat is so easy to use that workers can operate it with confidence, trusting it to alert them to gas threats in their proximity — indoors and out, in temperatures from -40 to +140°F (-40 to +60°C). Honeywell BW™ RigRat delivers:
- Up to 8 weeks of runtime on a single charge. Longer runtime than any are monitor in its class.
- Up to six slots for interchangeable gas sensors.Choice of electrochemical, PID, infrared, and catalytic bead sensors (measuring percent LEL and percent by volume).
- Integrated Noise sensor and Metrological data sensors.
- Enhanced configurations with programmable input and output.
- Approval for explosive atmosphere. Certified for ATEX/IECEx Zone 0 and CSA C1D1.
- BW™ RigRat Standard Package Contents:
- BW™ RigRat
- AC adapter
- LCD Cover
- Diffusion calibration cap assembly*
- Pump calibration tube assembly*
- External Filter (Pumped version only)
- QuickStart Guide
- Antenna 868-928MHz, RP-N**
- Antenna 2.4GHz, RP-N**
- Note: * Depends on whether the model is pumped or diffusion.
- ** Depends on wireless modem (if installed).
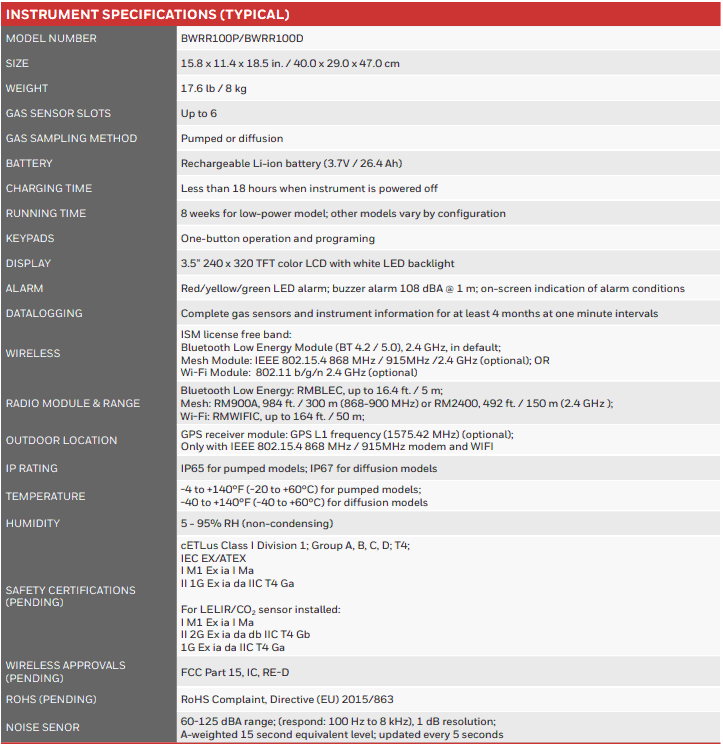
HONEYWELL BW™ RIGRAT TECHNICAL SPECIFICATIONS
Sensor configuration for Honeywell BW™ RigRat, Diffusion version
| Description | Order Number |
| Without PID, Dynament NDIR, or LEL sensor, Wi-fi or NB-IoT | BWRR100 D00 |
| Without PID, Dynament NDIR, or LEL sensor, Wi-fi | BWRR100 D01 |
| Without PID, Dynament NDIR, or LEL sensor, NB-IoT | BWRR100 D02 |
| Without PID, Dynament NDIR, or LEL sensor, Wi-fi and NB-IoT | BWRR100 D03 |
| Without PID, Wi-fi or NB-IoT | BWRR100 D10 |
| Without PID, Wi-fi | BWRR100 D11 |
| Without PID, NB-IoT | BWRR100 D12 |
| Without PID, Wi-fi and NB-IoT | BWRR100 D13 |
| Dynament NDIR,Wi-fi or NB-IoT | BWRR100 D00 |
| Dynament NDIR, Wi-fi | BWRR100 D01 |
| Dynament NDIR, or LEL sensor, NB-IoT | BWRR100 D02 |
| Dynament NDIR, or LEL sensor, Wi-fi and NB-IoT | BWRR100 D03 |
| LEL,Wi-fi or NB-IoT | BWRR100 D30 |
| LEL, Wi-fi | BWRR100 D31 |
| LEL, NB-IoT | BWRR100 D32 |
| LEL, Wi-fi and NB-IoT | BWRR100 D33 |
| PID and Dynament NDIR,Wi-fi or NB-IoT | BWRR100 D40 |
| PID and Dynament NDIR, Wi-fi | BWRR100 D41 |
| PID and Dynament NDIR, NB-IoT | BWRR100 D42 |
| PID and Dynament NDIR, Wi-fi and NB-IoT | BWRR100 D43 |
| Dynament NDIR and LEL,Wi-fi or NB-IoT | BWRR100 D50 |
| Dynament NDIR and LEL, Wi-fi | BWRR100 D51 |
| Dynament NDIR and LEL, NB-IoT | BWRR100 D52 |
| Dynament NDIR and LEL, Wi-fi and NB-IoT | BWRR100 D53 |
| LEL and PID,Wi-fi or NB-IoT | BWRR100 D60 |
| LEL and PIDL, Wi-fi | BWRR100 D61 |
| LEL and PID, NB-IoT | BWRR100 D62 |
| LEL and PID, Wi-fi and NB-IoT | BWRR100 D63 |
| PID, Dynament NDIR and LEL,Wi-fi or NB-IoT | BWRR100 D70 |
| PID, Dynament NDIR and LEL, Wi-fi | BWRR100 D71 |
| PID, Dynament NDIR and LEL, NB-IoT | BWRR100 D72 |
| PID, Dynament NDIR and LEL, Wi-fi and NB-IoT | BWRR100 D73 |
Sensor configuration for Honeywell BW™ RigRat, Pump version
| Description | Order Number |
| Without PID, Dynament NDIR, or LEL sensor, Wi-fi or NB-IoT | BWRR100 P00 |
| Without PID, Dynament NDIR, or LEL sensor, Wi-fi | BWRR100 P01 |
| Without PID, Dynament NDIR, or LEL sensor, NB-IoT | BWRR100 P02 |
| Without PID, Dynament NDIR, or LEL sensor, Wi-fi and NB-IoT | BWRR100 P03 |
| Without PID, Wi-fi or NB-IoT | BWRR100 P10 |
| Without PID, Wi-fi | BWRR100 P11 |
| Without PID, NB-IoT | BWRR100 P12 |
| Without PID, Wi-fi and NB-IoT | BWRR100 P13 |
| Dynament NDIR,Wi-fi or NB-IoT | BWRR100 P20 |
| Dynament NDIR, Wi-fi | BWRR100 P21 |
| Dynament NDIR, or LEL sensor, NB-IoT | BWRR100 P22 |
| Dynament NDIR, or LEL sensor, Wi-fi and NB-IoT | BWRR100 P23 |
| LEL,Wi-fi or NB-IoT | BWRR100 P30 |
| LEL, Wi-fi | BWRR100 P31 |
| LEL, NB-IoT | BWRR100 P32 |
| LEL, Wi-fi and NB-IoT | BWRR100 P33 |
| PID and Dynament NDIR,Wi-fi or NB-IoT | BWRR100 P40 |
| PID and Dynament NDIR, Wi-fi | BWRR100 P41 |
| PID and Dynament NDIR, NB-IoT | BWRR100 P42 |
| PID and Dynament NDIR, Wi-fi and NB-IoT | BWRR100 P43 |
| Dynament NDIR and LEL,Wi-fi or NB-IoT | BWRR100 P50 |
| Dynament NDIR and LEL, Wi-fi | BWRR100 P51 |
| Dynament NDIR and LEL, NB-IoT | BWRR100 P52 |
| Dynament NDIR and LEL, Wi-fi and NB-IoT | BWRR100 P53 |
| LEL and PID,Wi-fi or NB-IoT | BWRR100 P60 |
| LEL and PIDL, Wi-fi | BWRR100 P61 |
| LEL and PID, NB-IoT | BWRR100 P62 |
| LEL and PID, Wi-fi and NB-IoT | BWRR100 P63 |
| PID, Dynament NDIR and LEL,Wi-fi or NB-IoT | BWRR100 D70 |
| PID, Dynament NDIR and LEL, Wi-fi | BWRR100 D71 |
| PID, Dynament NDIR and LEL, NB-IoT | BWRR100 D72 |
| PID, Dynament NDIR and LEL, Wi-fi and NB-IoT | BWRR100 D73 |
Replacement Sensor for Honeywell BW™ RigRat
| Description | Order Number |
| Sensor Module (Analog) LEL 4R+ | C03-0801-000 |
| Ex NDIR (0-100% VOL) SIL l | C03-0990-000 |
| Ex NDIR (0-100% LEL) SIL l | C03-0990-100 |
| CO₂ NDIR (up to 50,000 ppm) | C03-0991-000 |
| Ex NDIR (0-100% VOL) LP | C03-0992-000 |
| Ex NDIR (0-100% LEL) LP | C03-0992-100 |
Replacement Accessories for Honeywell BW™ RigRat
| Description | Order Number |
| Dust Cap I/O Connector | 400-4083-000 |
| Connector Plug MALE 3POS Solder | 400-4105-003 |
| Connector Plug MALE 10POS Solder | 400-4105-010 |
| Connector Plug MALE 14POS Solder | 400-4105-014 |
| BW RigRat Antenna 868-928MHz, RP-N | 550-7056-000 |
| BW RigRat Antenna 2.4GHz, RP-N | 550-7057-000 |
| Stand for Alarm bar | F08-2119-000 |
| Sensor Under Foam BW RigRat | M01-2029-000 |
| Waterproof Membrane | M01-2067-000 |
| Rubber-Gas IN and OUT BW RigRat | W03-2009-000 |
| Rain Cover | W03-2038-000 |
| Noise Sensor Foam for BW RigRat | W03-2084-000 |
| HANDLE,RIGRAT | W03-2111-000 |
| LCD Protection Cover | W03-2129-000 |
| Noise Sensor Cover for BW RigRat | W03-2140-000 |
| Gas Inlet Connector (pump version only) | W03-3006-000 |
| Gas Cover Assembly (BW RigRat Diffusion) | W03-3015-000 |
| Pump calibration tube Assembly | W03-3020-000 |
| BASE ASSY | W03-3037-000 |
| Metal cage kit for BW RigRat | W03-3042-000 |
| Quick start guide (QSG) BW RigRat | W03-4002-000 |
How to Replace the Filter for Honeywell BW™ RigRat, Pumped version
- Turn off the BW RigRat.
- Loosen the two Philips screws that secure the filter.
- Lift the filter out of its docking area
- Dispose of the old filter properly.
- Press a new filter into place.
- Replace and tighten the two Philips screws. Do not overtighten.
How to Replace the Filter for Honeywell BW™ RigRat, Diffusion version
If the filters over the sensors appear dirty, replace them. The external filters are located inside the panel on the rear of the BW RigRat:
- Turn off the BW RigRat.
- Remove the Rain Protector (if installed)
- Remove the four screws that hold the Sensor Cover in place.
- Carefully take out the O-rings in each sensor location on the plate.
- Remove the current filters
- Place new filters (P/N: M01-2067-000) into each of the six locations.
- Place the O-rings back in their original locations
- Put the plate back in place.
- Tighten the four screws.
- Replace the Rain Protector (if needed).
How to Replace the Sensor for Honeywell BW™ RigRat

- Gently lift out the desired sensor module with your fingers. If it is seated very tightly in the socket, do not pull it with heavy force. Gently rock it slightly back and forth while lifting.
- Install the replacement sensor. It can only go into its slot one way. The connector inside the instrument and the indexing guides are good visual indicators of how to set the sensor into position. Make sure the indexing keys are aligned and press the sensor into place to ensure it is seated firmly.
- Replace the cover and tighten the four screws
Warning: It is extremely important that sensors are installed in the correct orientation. When installing a new sensor, the plastic film should be on top of the sensor. Once the sensor is installed, remove the plastic film. Always perform a full calibration after replacing sensors
Replacing the Pump
If the pump requires replacement, follow this procedure. The pump assembly part number is P/N: W03-3016-000.
- Turn off the BW RigRat.
- Remove the four screws that hold the sensor compartment cover.
- Lift off the sensor compartment cover and turn it over.
- Remove the four screws that hold the pump assembly.
- Lift the pump assembly from the side farthest from the gas plate and slightly pull it away from the gas plate.
- Remove the pressure sensor block by pulling it away from the pump
- Attach the pressure sensor block to the new pump by pressing it into place.
- Install the pump assembly. Note that the two inlets to the inlet and outlet for the pump require tilting the pump assembly when you reassemble the system.
- Reverse the disassembly process to reassemble the system.
- When you are sure all parts are secure, turn on the instrument and test the pump to ensure that it is operational.
Note: After replacing a pump, perform a pump test and perform a full calibration.
RAEMet Sensor Installation
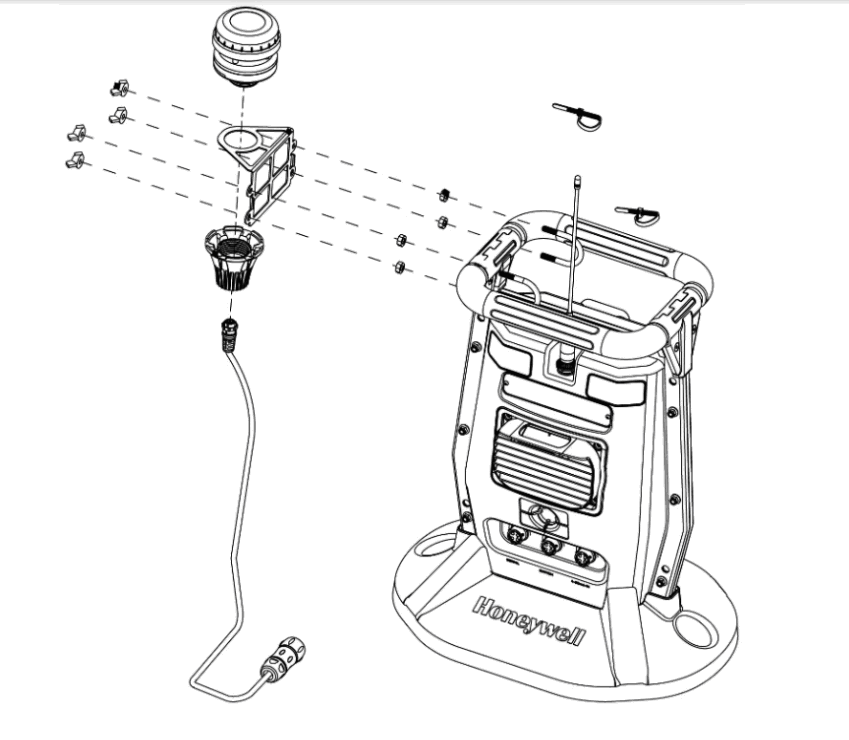
If your BW RigRat is equipped with a RAEMet meteorological sensor (P/N: W03-3045-000), it is typically removed for storage and must be attached before using it.
- If the BW RigRat is on, turn it off. (Never attach or remove the RAEMet sensor without first turning off the instrument’s power.)
- Attach the RAEMet to the instrument‘s handle using the two U-shaped bolts and the wingnuts. Then attach the sensor to the bracket.
- Remove the cover over the Serial receptacle.
- Align the RAEMet’s connector plug with the BW RigRat’s receptacle using the indexing keys and slots as a guide.
- Press the RAEMet’s base into place, and then turn the locking ring to tighten the connection. Never force the connector in or out of the receptacle. 6. Tighten the locking ring until the RAEMet sensor is firmly seated. Do not turn the entire RAEMet sensor.
Important: If the RAEMet and BW RigRat’s receptacle are not aligned properly, electrical connections will not be made and the RAEMet sensor will not operate. Also, when the RAEMet sensor is not attached to the instrument, make sure the cover is securely closed to keep moisture and debris from entering the base.
Note: Do not remove the RAEMet sensor from the instrument while it is in operation.
Note: Keep strong magnets away from the RAEMet sensor. It contains a compass, and strong magnetism can affect its accuracy.


Reviews
There are no reviews yet.